_6290686-as-Smart-Object-1

I saw a great looking gadget that allows you to have a reflector held just far enough away from your on-camera flash to create the effect that you are bouncing the flash off a wall.

Why would someone want such a thing? Well, if you are shooting indoors with flash at an event, and the walls are distant or colored, your light will be either inadequate or tinted, which means more post. Also, obstructions and gaps can cause the light output from a bounced flash to be unpleasantly uneven.

The only solution before the bounce wall was to mount your flash on an off camera bracket or put it on a cord, with or without a pole. These are awkward solutions – holding the flash in your hand deprives you of proper camera holding technique, putting it on a pole makes you a clumsy spectacle, and putting a flash on a bracket puts a substantial weight off axis, especially when you add the light sphere or other diffuser necessary to minimize the nasty look of on camera flash.

The bounce wall neatly solved this problem. A mini reflector was placed off camera on a bracket where a flash could be fired off it, creating a diffused, off-axis light source that does not interfere with holding the camera or render you an oaf.

Unfortunately, Sunbounce wants $125 for this solution. For that they give you the bracket and one bounce card. Additional 8 x 11 cards cost $32-37 EACH.  Sunbounce makes durable, well designed gear, but no one ever accused them of being inexpensive.

Fortunately, you can build a suitable substitute for less than a third of the cost in shockingly little time.

You will need:

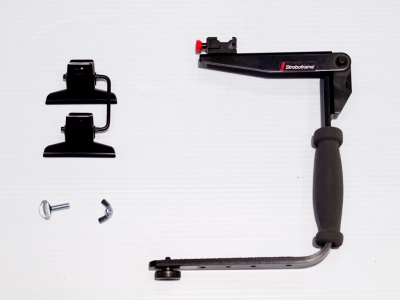
  •  The venerable Stroboframe 350 quick flip bracket, which is available for under $30, even less at photo flea markets. You may even already own one.

  •  A double clip. The Manfrotto Multi-Clip 375 is widely available for about 10-12 bucks. It’s the same as the Selens S-059 widely available on eBay.

  • A 1/4 inch 20 pitch nut and bolt combo to fasten the Clip to the bracket.

  • One or more pieces of 8 x 10 self-adhesive foam board. These are usually less than 2 bucks a sheet and come in packs of 10 for a little over $10.

  • Patterned paper or foil of your choice.

_6290572-as-Smart-Object-2

THE BRACKET

First, remove the shoe mount, which we will be replacing with a clip to hold the reflector.

_6290583-as-Smart-Object-1

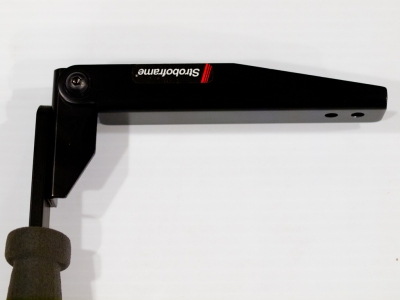
Next fold the bracket out to its full extension.

_6290589-as-Smart-Object-1

Attach the double clip with the nut and bolt as shown to the bottom of the bracket arm to allow full movement. You should be able to tilt using the double clip and swivel by loosening and tightening the nut and bolt combo.

_6290608-as-Smart-Object-1

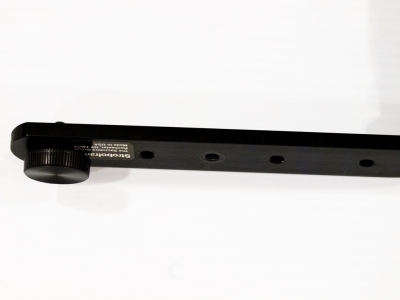
Attach the bracket to the your camera via the tripod socket, making sure that you move the mounting screw from the default middle hole to the end for full extension.

_6290652-as-Smart-Object-1

THE CARDS

For in studio use, I never buy the expensive collapsible reflectors. All my handheld reflectors are foamcore boards of various sizes, covered with cheap, readily available reflective material. I will use the same strategy here.

To make a card, just take a self adhesive foam board and apply whatever surface you want to use. For silver, just use the dull side of aluminum foil. For gold, get some gold wrapping paper. If you want to mimic the zebra gold/silver or the silver or gold and white, just go to a stationery or art supply store and get some herringbone paper. I found excellent fine papers combining gold, silver, white and ecru for $3 or less for a big sheet. (AC Moore, Michael’s, Blick, etc all run frequent 40% off coupons) Wedding and xmas paper at the dollar store is even cheaper. Tip: use a rolling pin or brayer to apply the paper to the adhesive smoothly.

_6290698-as-Smart-Object-1   _6290707-as-Smart-Object-1

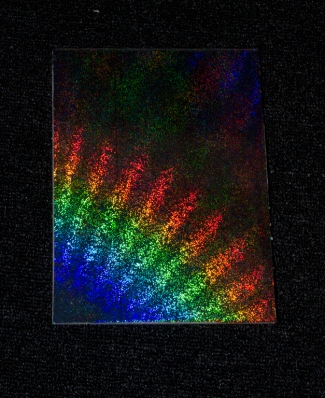
For a nice neutral reflector that stays focused, try holographic paper, available in a decent sized roll for under $10. It photographs as a rainbow but the colors mix to form white when used as a reflector.

_6290705-as-Smart-Object-1

The back of your board always serves as standard white.

PS You can also apply spray paint, especially if want to create an effect like the “Galaxy Gold: Spot Gold” from Sunbounce.

USE

Just clip one of your boards into the clips, orient it at 45 degrees above and to the side of your subject, aim your on- camera flash at it in TTL mode, and you are good to go. When you are finished, it folds up nice and tight to go in your bag.

_6290686-as-Smart-Object-1       _6290766-as-Smart-Object-1

Total project cost:

Stroboframe 350                $26.85

Selens double clip                 9.80

Nut and bolt                             1.22

5 sheets foam core                8.64

1 sheet fine paper                  3.24

2 rolls wrapping paper        2.16

1 Roll Holographic paper   6.70

Total cost of DIY bracket: $37.87   plus one card  $42.85  Sunbounce  bracket plus one card $124.36

Additional DIY cards $1.60-9.74 each, average cost $4.15 each.

Sunbounce cards $31.43-37.76 each.

Project cost for DIY bracket plus five cards: $61.61

Sunbounce bracket plus 5 cards: $256.41

This rig may lack the ball joint and a couple of inches of reach, but overall, at one quarter the price, I’ll live with those minor shortcomings.